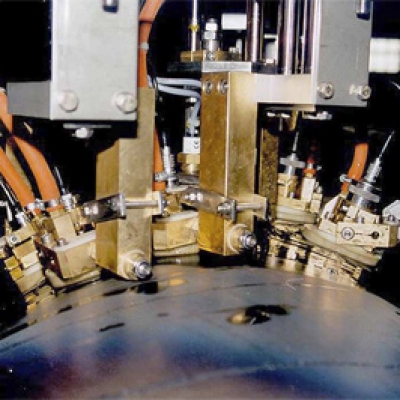
... for inspection of SSAW pipes
For the inspection of the weld and the heat affected zone (parent material of the strip next to the weld), several probe pairs are used to test the pipe weld in the 12 o’clock position. All probe pairs can be rotated to match the weld angle of the pipe. Each probe is flexibly mounted for perfect guidance on the pipe surface. In addition, each probe pair can be individually lowered and lifted by pneumatic means (important to achieve short untested ends in case of an off-line inspection).
Ultrasonic coupling is achieved by means of a narrow water gap between the protective face of the probe and the pipe surface. Curved skids (guiding shoes) are used to guide each probe on the pipe surface.
See pdf document for more details.


